前言 有了之前几章的积累,相信大家都应该能进行简单的 Tauri 应用程序开发了,那么接下来最后的一章就让我们来简单讲述下程序编写完成后的发布,文档的部署以及程序的自动更新。
程序编译发布 我们将使用 Github Actions 来进行程序的编译和发布
可参考 Tauri: Cross-Platform Compilation
1
2
3
4
5
6
7
8
9
10
11
12
13
14
15
16
17
18
19
20
21
22
23
24
25
26
27
28
29
30
31
32
33
34
35
36
37
38
39
40
41
42
43
44
45
46
47
48
49
50
51
52
53
54
55
56
57
58
// ./{Project}/.github/workflows/release.yml 手动创建相关文件及文件夹 name: Release on: push: tags: - 'v*' workflow_dispatch: jobs: release: strategy: fail-fast: false matrix: platform: [macos-latest , ubuntu-latest , windows-latest ]runs-on: ${{ matrix.platform }} steps: - name: Checkout repository uses: actions/checkout@v2 - name: Node.js setup uses: actions/setup-node@v1 with: node-version: 16 - name: Rust setup uses: actions-rs/toolchain@v1 with: toolchain: stable - uses: pnpm/action-setup@v2.2.2 with: version: 6.0 .2 run_install: | - recursive: true args: [--frozen-lockfile, --strict-peer-dependencies] - args: [--global, gulp, prettier, typescript] - name: Install dependencies (ubuntu only) if: matrix.platform == 'ubuntu-latest' run: | sudo apt-get update sudo apt-get install -y libgtk-3-dev webkit2gtk-4.0 libappindicator3-dev librsvg2-dev patchelf - name: Install app dependencies and build web run: pnpm install && pnpm build - name: Build the app uses: tauri-apps/tauri-action@v0 env: GITHUB_TOKEN: ${{ secrets.GITHUB_TOKEN }} with: tagName: v__VERSION__ releaseName: 'v__VERSION__' releaseBody: 'See the assets to download this version and install.' releaseDraft: true prerelease: false
⚠️ Github Actions 每月免费额度有限,且 windows 环境编译耗时计费为 Linux 环境 2 倍, Macos 则是 10 倍,记得避免频繁使用耗尽资源
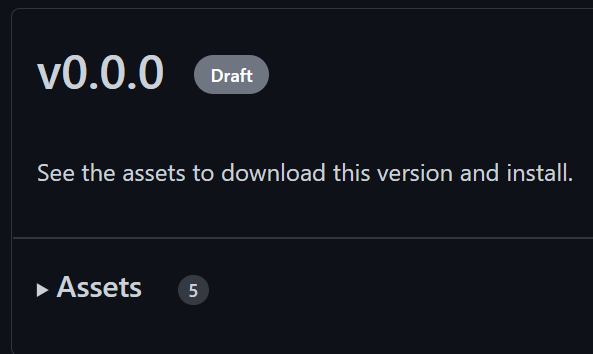
程序发布 编译完成后前往项目 Release 界面查看,此时应为 Draft 版本即草稿版本,并未正式发布,手动更新描述后即可发布。
文档部署 此处假设本地项目已有基于 Vitepress 构建的文档, 且基于 Pnpm 构建
Github Pages 部署
Github 创建 username.github.io 空 public 仓库
Github 远程仓库添加 gh-pages 分支,其中内容不用管
Github 远程仓库 `Settings -> Pages -> Build and deployment
-> Source选择Deploy from a branch/ Branch 选择gh-pages /(root)`
本地项目文件夹添加对应编译及部署的 Github workflows,及 vitepress 设置正确的 base,一般应为 /仓库名/
1
2
3
4
5
6
7
8
9
10
11
12
13
14
15
16
17
18
19
20
21
22
23
24
25
26
27
28
29
30
31
32
33
34
35
36
// ./{project}/.github/workflows/deploy.yml name: Deploy on: push: branches: - main jobs: deploy: runs-on: ubuntu-latest steps: - uses: actions/checkout@v2 - uses: actions/setup-node@v3 with: node-version: 16 - uses: pnpm/action-setup@v2.2.2 with: version: 6.0 .2 run_install: | - recursive: true args: [--frozen-lockfile, --strict-peer-dependencies] - args: [--global, gulp, prettier, typescript] - name: Install dependencies run: pnpm install - name: Build run: pnpm docs:build - name: Deploy uses: peaceiris/actions-gh-pages@v3 with: github_token: ${{ secrets.GITHUB_TOKEN }} publish_dir: docs/.vitepress/dist
本地执行 git push 命令后会自动触发 workflow 编译文档
在远程仓库查看 Actions 选项,会发现除了自定义的 Deploy,还会出现一个 pages-build-deployment, 手动执行该 workflow 将会将编译后的内容部署到 gh-pages 分支
或不使用 github actions 自动部署,在本地执行 pnpm docs:build 命令后,将 ./docs/.vitepress/dist/ 中的内容替换 gh-pages 中内容
稍等片刻即可访问对应文档网站
服务器部署 可参照 hexo 博客部署,也可手动部署,由于笔者文档改动不会很频繁,所以此处仅讲述手动部署至腾讯云服务器
本地执行 pnpm docs:build ,vitepress 不用设置 base 选项
通过 WinSCP 登陆至服务器,创建空文件夹用以放置文档编译后的内容,此处假设是 /home/project_name
将本地编译后的内容全数复制到对应文件夹
设置 nginx 重定向及在服务器管理添加对应域名解析,此处仅作一简单示例
1
2
3
4
5
6
7
8
9
10
11
12
13
14
15
16
17
18
19
20
21
22
23
24
25
26
27
28
29
30
31
32
33
// project.conf listen 80 ;listen [::]:80 ;server_name your.website.com;return 301 https://$host $request_uri ;server {listen 443 ssl http2;listen [::]:443 ssl http2;server_name your.website.com;ssl_certificate /etc/nginx/ssl/your.website.com_bundle.crt;ssl_certificate_key /etc/nginx/ssl/your.website.com.key;if ($request_method !~ ^(GET|POST|PUT|DELETE)$) {return '403' ;access_log /var/log/nginx/your.access.log;error_log /var/log/nginx/your.error .log warn ;root /home/project_name;index index.html;location / {try_files $uri /index.html;
稍等片刻即可访问对应文档网站,若发现会跳转至其他域名可能是本地缓存问题,可强制清除缓存或使用无痕模式查看
版本更新 手动获取更新 手动更新只会检查仓库最近的 release 是否是新版本,然后引导用户前往下载,自定义程度高,但由于需要用户先删除旧版本然后安装新版本,较为繁琐,并不推荐。
1 2 3 4 5 6 7 8 9 10 11 12 13 14 { "tauri" : { "allowlist" : { "all" : true , "http" : { "scope" : [ "https://api.github.com/repos/(Owner)/*" ] } } , } }
1 2 3 4 5 6 7 8 9 10 11 12 13 14 15 16 17 18 19 20 21 22 23 24 25 26 27 ...import { fetch } from "@tauri-apps/api/http" ;async function get_latest_release (owner: string , repo: string ) {const unsafe_response = await fetch (`https://api.github.com/repos/${owner} /${repo} /releases/latest` ,method : "GET" ,timeout : 30 ,const response : any = Object .assign ({}, unsafe_response);if (response.code === 204 ) {console .log ("no latest" );else {const note = response.data .body ;const source = response.data .html_url ;const name = response.data .name ;const tag = response.data .tag_name ;const time = response.data .published_at ;console .log (response.data );
自动更新 可参考 Tauri: Updater 或 Simple guide on setting up auto updater
1
2
3
4
5
6
7
8
9
10
11
12
13
14
15
16
17
18
19
20
21
22
23
// 生成私钥及公钥"signer" "generate" "-w" "~/.tauri/clean-recent.key" in order to encrypt the secret key... done 'll not be able to sign your update package and updates will not work. ---------------------------
Github 仓库添加环境变量 TAURI_PRIVATE_KEY, TAURI_KEY_PASSWORD, endpoints 可以理解为一个需要自定义的 api,当 Tauri 自动向其发送请求的时候需要返回符合规范的 JSON 格式数据,pubkey 为生成的公钥。
1 2 3 4 5 6 7 "updater" : { "active" : true , "dialog" : true , "endpoints" : [ "where should response an update.json file when request" ] , "pubkey" : "xxxx" } ,
如果 active 设置为 true, Tauri 应用会在启动时自动向 endpoints 发送请求确认是否存在新版本,否则需要自己操作并设置 "dialog": false, 然后手动检查。
1
2
3
4
5
6
7
8
9
10
11
12
13
import { checkUpdate, installUpdate } from '@tauri-apps/api/updater' import { relaunch } from '@tauri-apps/api/process' try {const { shouldUpdate, manifest } = await checkUpdate ()if (shouldUpdate) {await installUpdate ()await relaunch ()catch (error) {console .log (error)
更近一步的全流程自动化请参考 clash-verge 的更新脚本及 Github Actions,因为是由国人出品的,所以你会看见一些中文注释,很有亲切感。
结语 到此为止,初始 Tauri 系列就暂告一段落了,作者也完成了第一个 Tauri App —— mission-backup 的开发,当然其中也踩了不少坑,会单开一个系列讲讲其中的故事。
现在你问我喜不喜欢 Tauri,我会回答是。
就个人而言,rust 只要不碰生命周期一切岁月静好,前端又是自己的老本行,开发起来可以说并不十分困难,对比 electron,为了让它跑起来我甚至装了两遍环境。
但若是问我推不推荐,我会持保留意见。
一方面 rust 终究是有门槛的,其它语言里简单的问题有可能复杂程度在 rust 里会极速上升;另一方面 rust 和 Tauri 环境都称不上完善,只能说欣欣向荣,很多 plugin 或 crate 要么没有,要么几年没更新过,不像 nodejs 可能重复的就有许多。这就对程序员的搜索能力和开发能力,甚至是提问题的能力都有所要求。
做下一个 App 去喽,希望作者的文章对你有所帮助!